> ## Documentation Index
> Fetch the complete documentation index at: https://docs.permutive.com/llms.txt
> Use this file to discover all available pages before exploring further.
# Creating Classification Cohorts
> How to create Classification Cohorts from a trained model
## Overview
This guide walks you through creating Classification Cohorts from a trained Classification Model. Once your model has finished training, you can create cohorts for each label at different confidence thresholds.
**Prerequisites:**
* A trained Classification Model (training takes approximately 12 hours)
* Access to the Permutive Dashboard with cohort creation permissions
## Understanding the Confidence Curve
Once the model has been trained, you will see a curve that shows the expected reach for each point along the confidence scale.
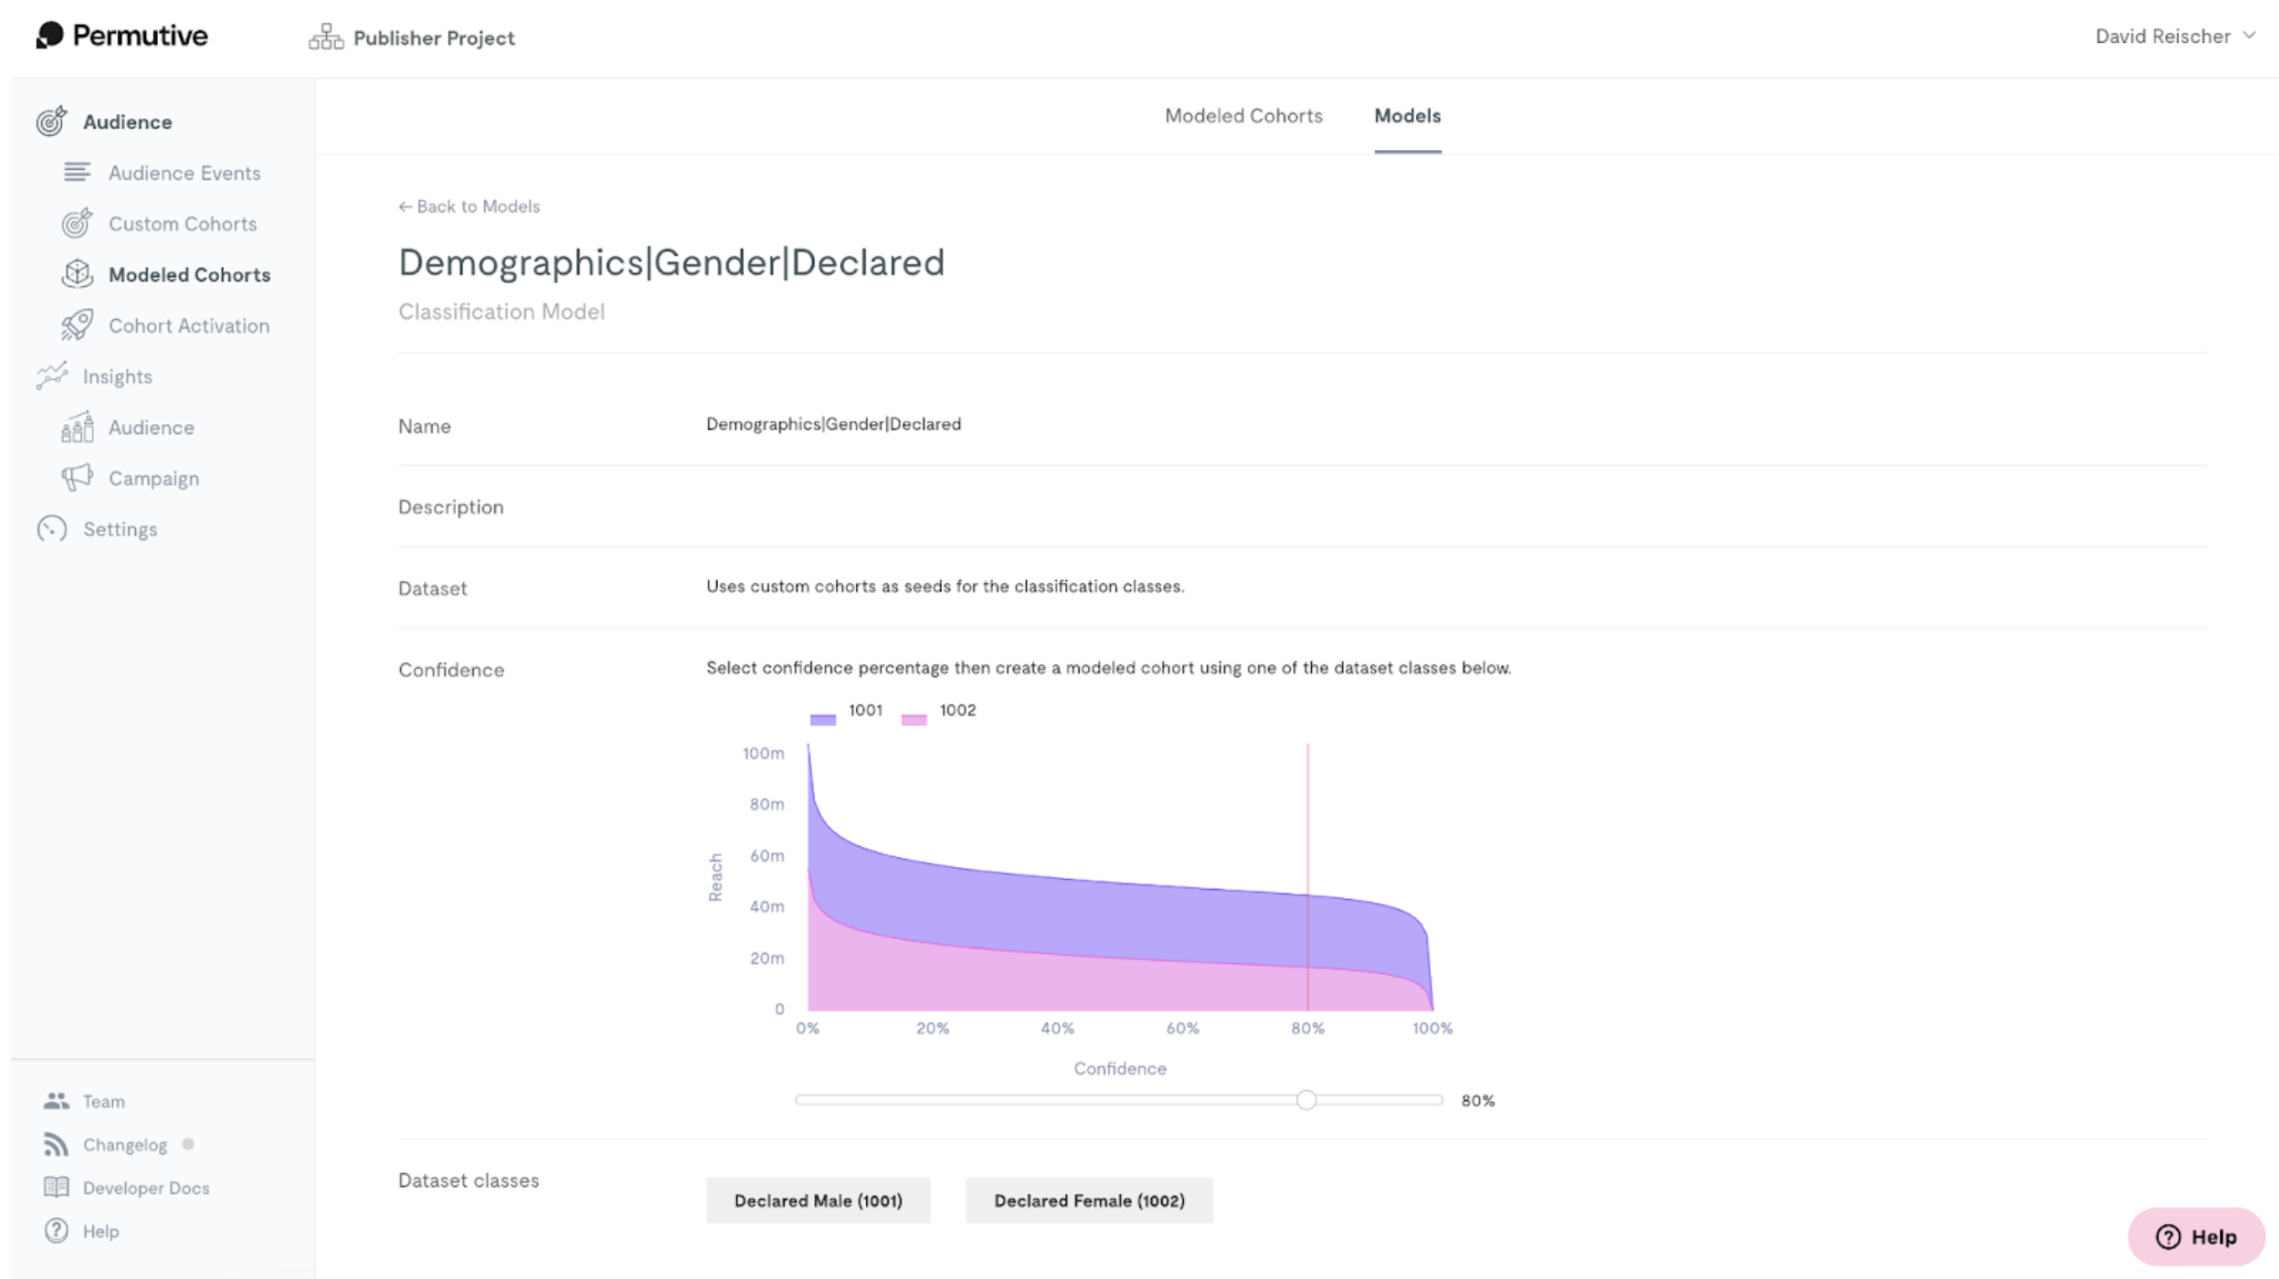 The confidence measures how sure the model is about a given prediction. While the reach of a classification model is the entire audience, the model will be less certain about some users than others. Use the confidence threshold to restrict your model to only classify users it is more certain about.
## Steps
Move the slider to select a minimum confidence threshold.
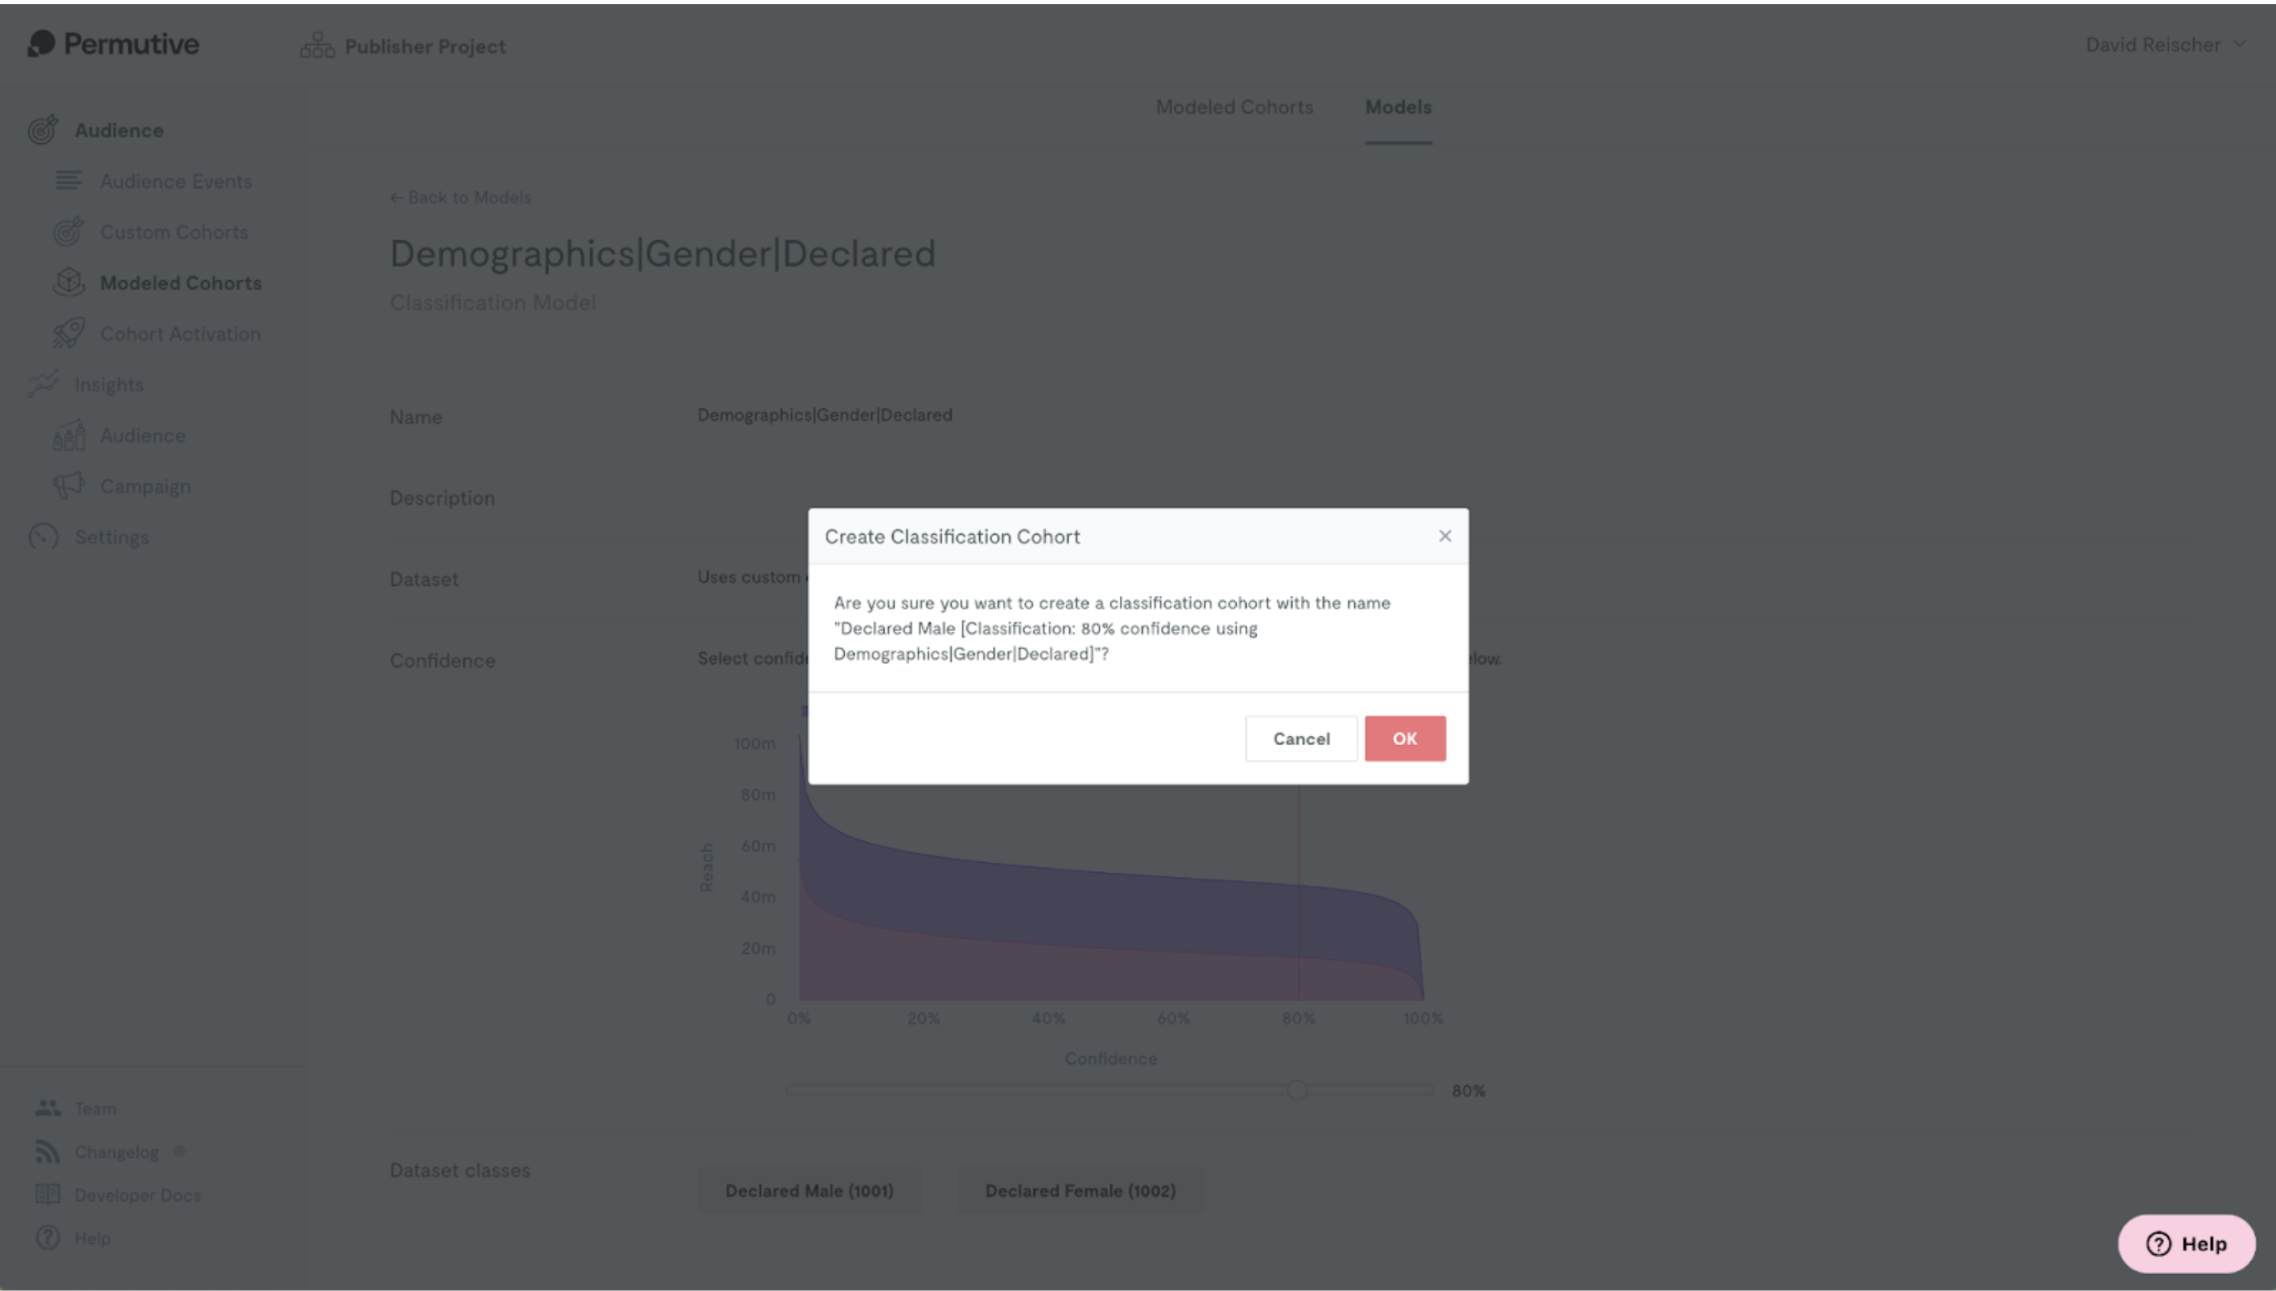
Click on one of the *Dataset classes* buttons to create a cohort for each of the labels in the model.
A modal will appear asking for confirmation to create the Classification Cohort.
The confidence measures how sure the model is about a given prediction. While the reach of a classification model is the entire audience, the model will be less certain about some users than others. Use the confidence threshold to restrict your model to only classify users it is more certain about.
## Steps
Move the slider to select a minimum confidence threshold.
Click on one of the *Dataset classes* buttons to create a cohort for each of the labels in the model.
A modal will appear asking for confirmation to create the Classification Cohort.
 **Multiple cohorts**: You can create multiple Classification Cohorts from the same model using different combinations of seed labels and confidence thresholds.
## Enabling Activations
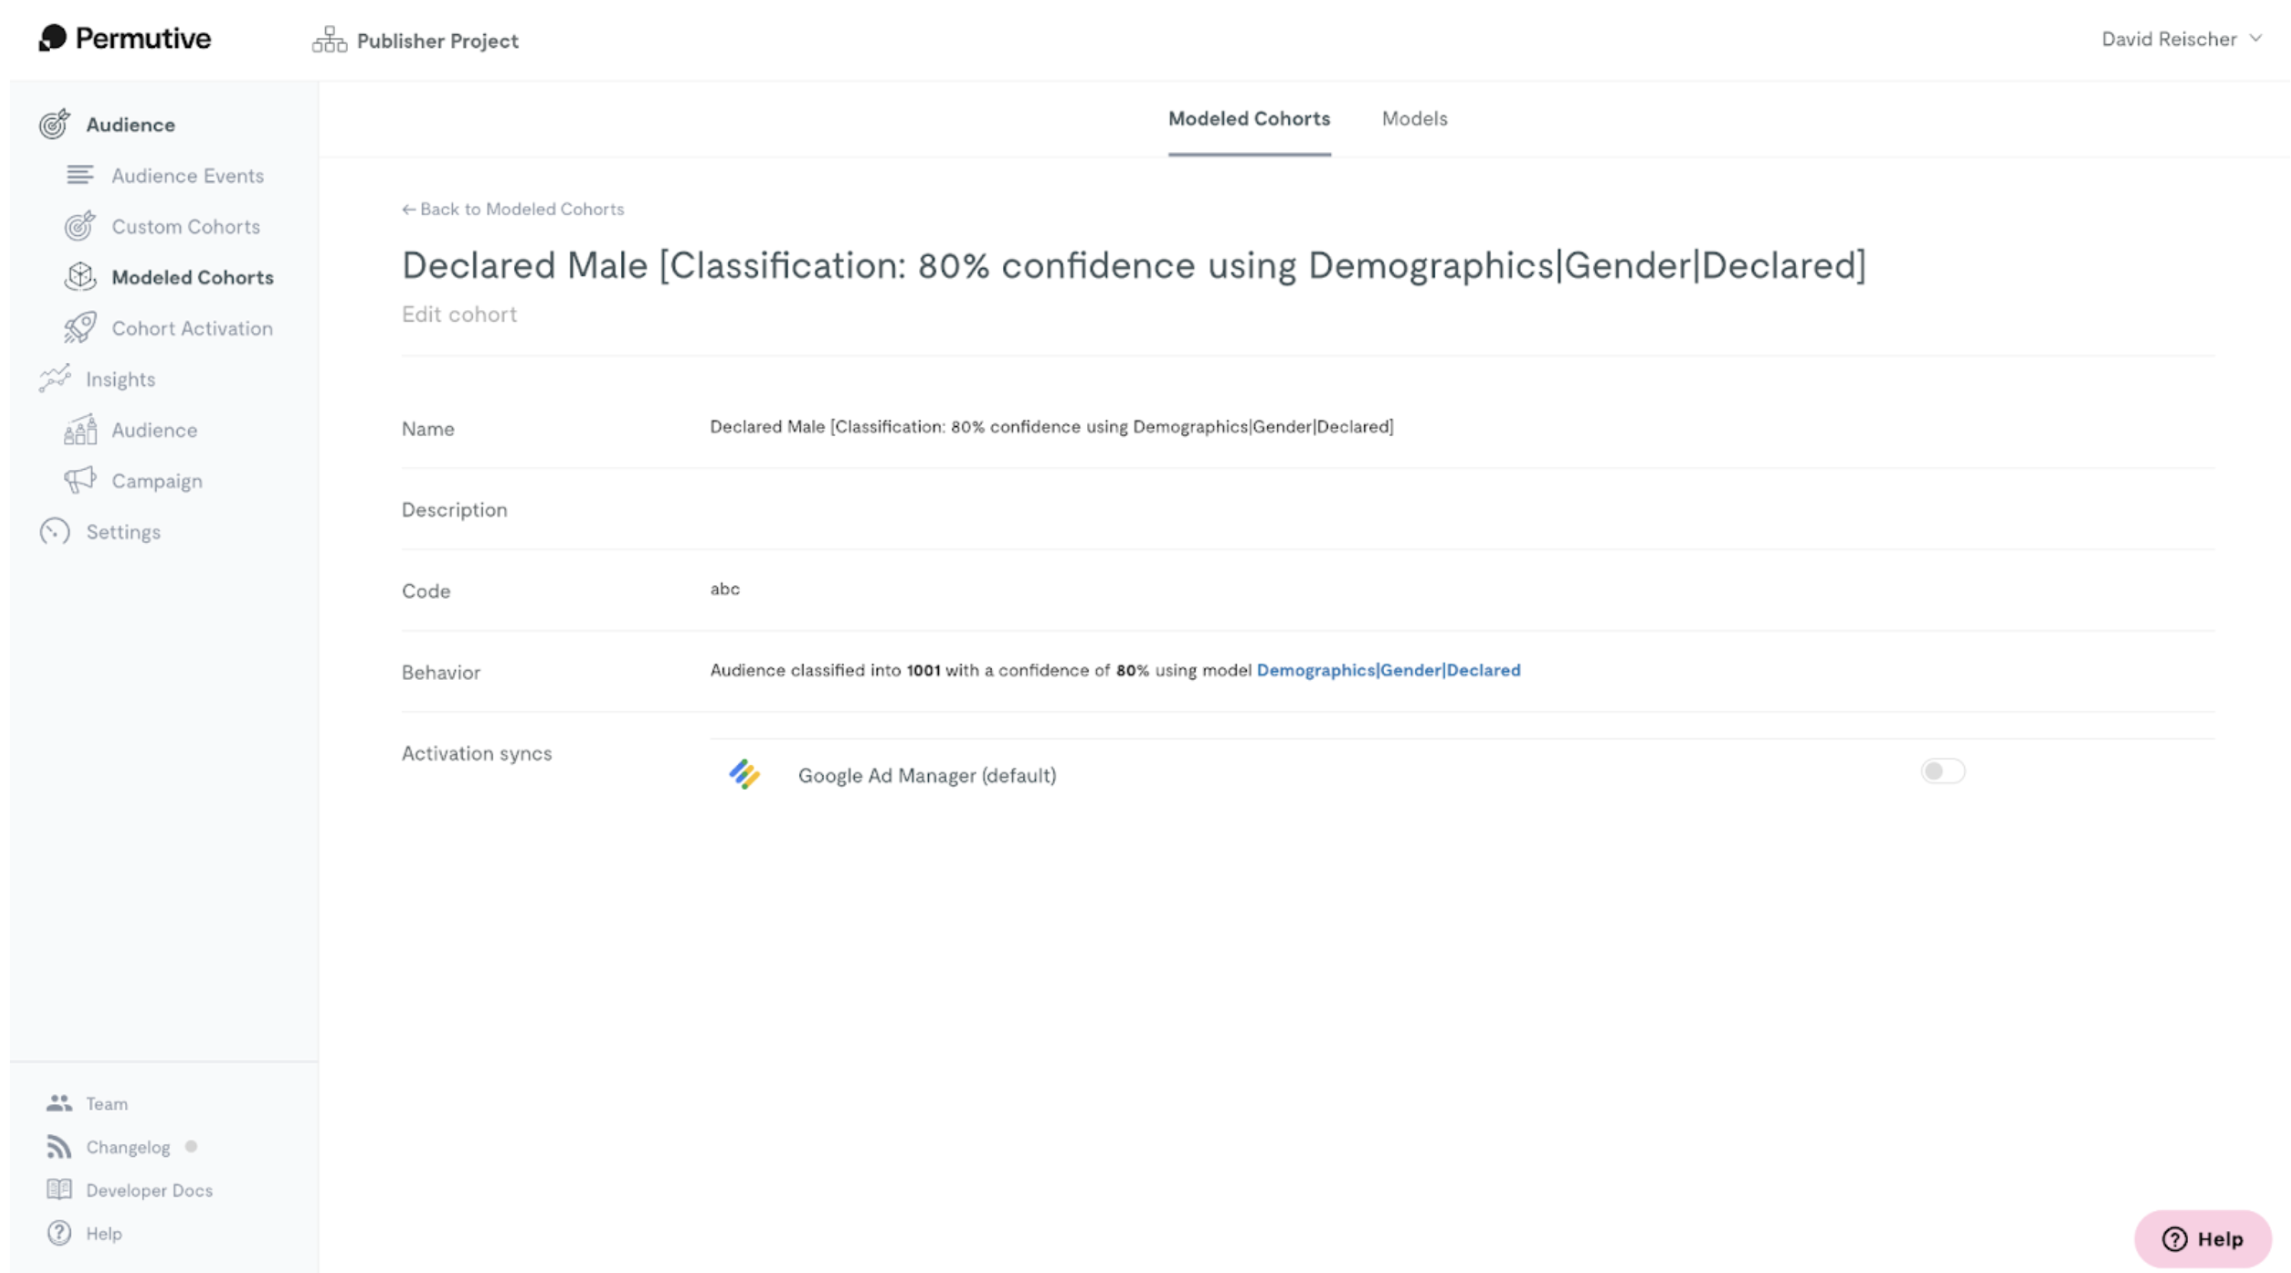
Once you create the Classification Cohort, you will find it on the *Modeled Cohorts* page. Here you can also enable activations for the cohort to push to ad servers such as Google Ad Manager and Xandr.
**Multiple cohorts**: You can create multiple Classification Cohorts from the same model using different combinations of seed labels and confidence thresholds.
## Enabling Activations
Once you create the Classification Cohort, you will find it on the *Modeled Cohorts* page. Here you can also enable activations for the cohort to push to ad servers such as Google Ad Manager and Xandr.
 ## Next Steps
Manage and filter your cohorts
Return to product overview
## Next Steps
Manage and filter your cohorts
Return to product overview