> ## Documentation Index
> Fetch the complete documentation index at: https://docs.permutive.com/llms.txt
> Use this file to discover all available pages before exploring further.
# Creating Custom Cohorts
> How to build audience segments using the Cohort Builder
## Overview
This guide walks you through creating a Custom Cohort in the Permutive Dashboard. Custom Cohorts let you define precise audience segments based on user behaviors, properties, and data sources.
**Prerequisites:**
* Access to the Permutive Dashboard with cohort creation permissions
* Permutive SDK deployed and tracking events
## Steps
In the Permutive Dashboard, go to *Custom Cohorts* and click the *+ Add Cohort* button.
Give your cohort a unique, descriptive name and add relevant tags for organization or a description of the cohort. The description and tags are optional to include but can be helpful for discovery and cohort management later on.
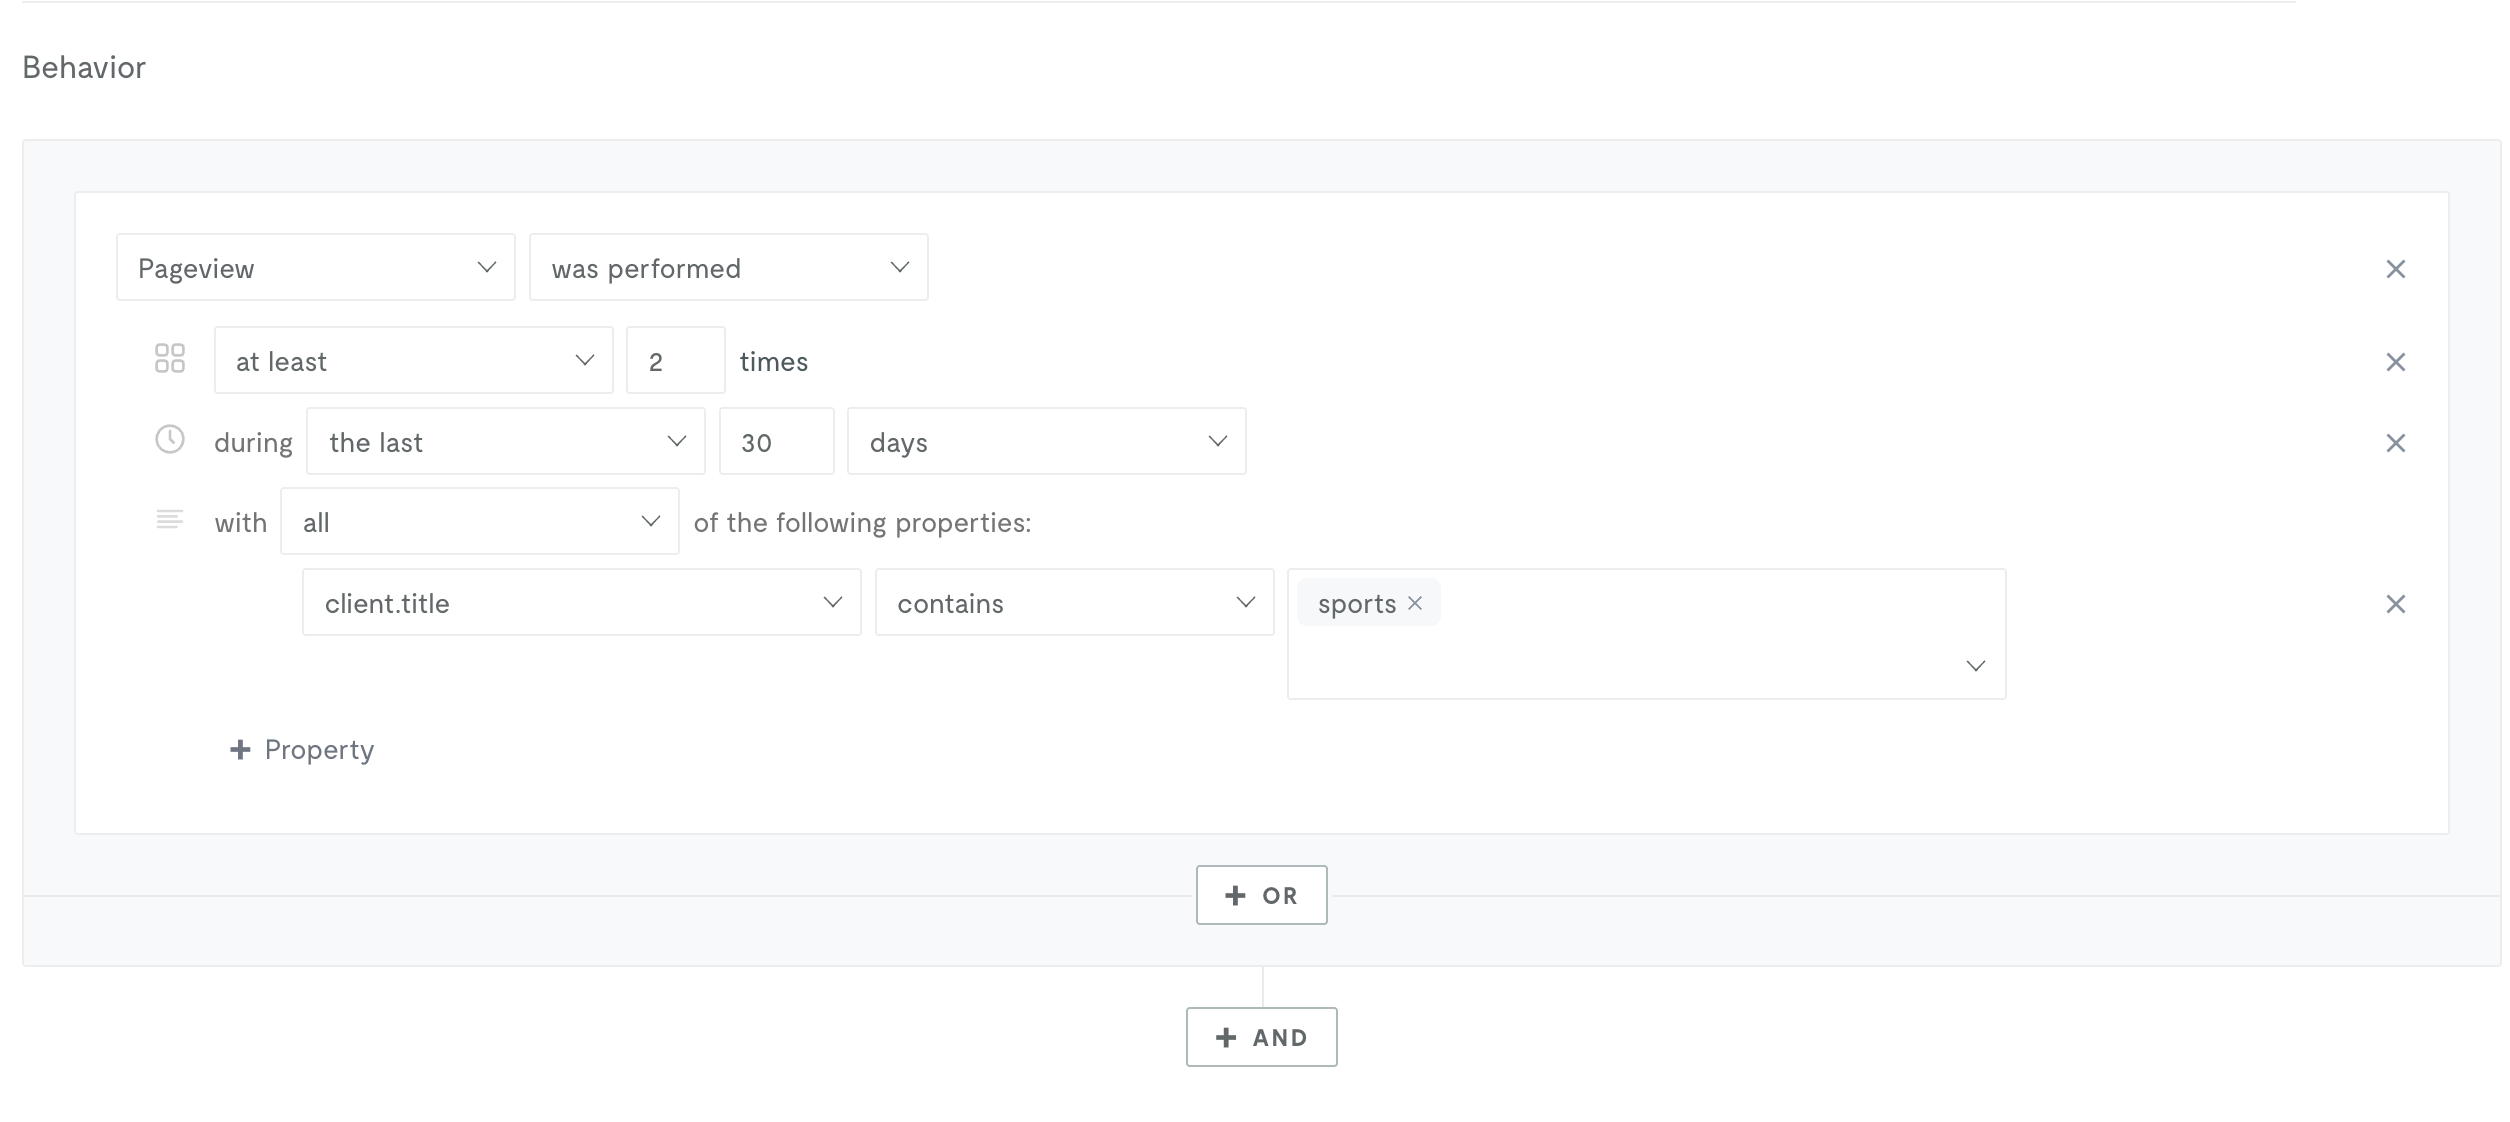
In the Cohort Builder, select the event you want to base your cohort on (e.g., Pageview, VideoView, custom event, etc.).
Configure your targeting using:
* **Properties**: Filter based on event properties like URL, title, or custom properties
* **Recency**: Specify the time window (e.g., "in the past 30 days")
* **Frequency**: Set how many times the action must be performed (e.g., "at least 3 times")
Chain multiple conditions together using **AND** and **OR** logic to create complex targeting rules.
Click *Calculate* next to Audience Size to see how many users would have qualified for this cohort over the past 30 days. This is the **Predicted Audience Size (PAS)** — a historical estimate useful for forecasting scale. Once the cohort is saved and deployed, a separate **Live Audience Size (LAS)** metric tracks users as they are evaluated (updated approximately every 4 hours). For more details, see [Predicted and Live Audience Size](/products/signals/cohorts/custom#whats-the-difference-between-predicted-audience-size-and-live-audience-size).
If the audience size meets your needs, click *Save* to deploy the cohort.
 ## Tips
**Building effective cohorts:**
* When using `client.url contains`, avoid the trailing `/` on the URL. The Permutive SDK sanitizes URLs, so `example.com/123/` is counted as `example.com/123`.
* Commas are useful when uploading multiple property values at once. When building cohorts with values containing commas (e.g., $20,000), escape commas with a backslash: `\$20,000\`.
## Next Steps
Send your cohort to advertising platforms
Target users based on Internet Service Provider
Build cohorts from external data sources
Return to product overview
## Tips
**Building effective cohorts:**
* When using `client.url contains`, avoid the trailing `/` on the URL. The Permutive SDK sanitizes URLs, so `example.com/123/` is counted as `example.com/123`.
* Commas are useful when uploading multiple property values at once. When building cohorts with values containing commas (e.g., $20,000), escape commas with a backslash: `\$20,000\`.
## Next Steps
Send your cohort to advertising platforms
Target users based on Internet Service Provider
Build cohorts from external data sources
Return to product overview