> ## Documentation Index
> Fetch the complete documentation index at: https://docs.permutive.com/llms.txt
> Use this file to discover all available pages before exploring further.
# Uploading Advertiser Data
> How to upload first-party data to Clean Room data sources
## Overview
This guide walks advertisers through uploading first-party data to Clean Room data sources for matching with publisher data.
**Prerequisites:**
* First-party data prepared with common identifiers (hashed emails, mobile IDs, etc.)
* Data taxonomy defined
## Steps
In the left menu of your demand-side workspace, click **Data Sources**.
Click **Add Source**.
Enter a name and description for your data source:
* Use a clear, descriptive name (e.g., "Lapsed customers")
* Include details about the data set in the description
Prepare a taxonomy file in CSV format. The taxonomy defines segment IDs and names.
Click **Upload Taxonomy** and select your file.
Once the taxonomy is validated, you'll be granted access to a GCS (Google Cloud Storage) bucket.
Upload your raw data files to the provided GCS bucket using the following format:
* **File format**: Tab-separated file (TSV) with NO headers
* **Columns** (in order): `id`, `tag`, `segments`
* `id`: The user identifier (e.g., hashed email, mobile ad ID, IP address)
* `tag`: The identifier type - use one of: `email_sha256`, `appnexus`, or `ip_address`
* `segments`: Comma-separated list of segment IDs as defined in your taxonomy file
* **Example row**: `abc123def456\temail_sha256\tsegment_001,segment_042,segment_103`
Data will begin processing automatically.
## Permissioning Data (Publisher-Driven Workflow)
If following the publisher-driven workflow, you also need to permission the data source to the publisher's demand-side workspace:
Ask the publisher for their demand-side Organization ID (found in their Settings).
Input the publisher's Organization ID, set any time limits or usage restrictions if needed, and click **Grant Permission**.
### What You'll See
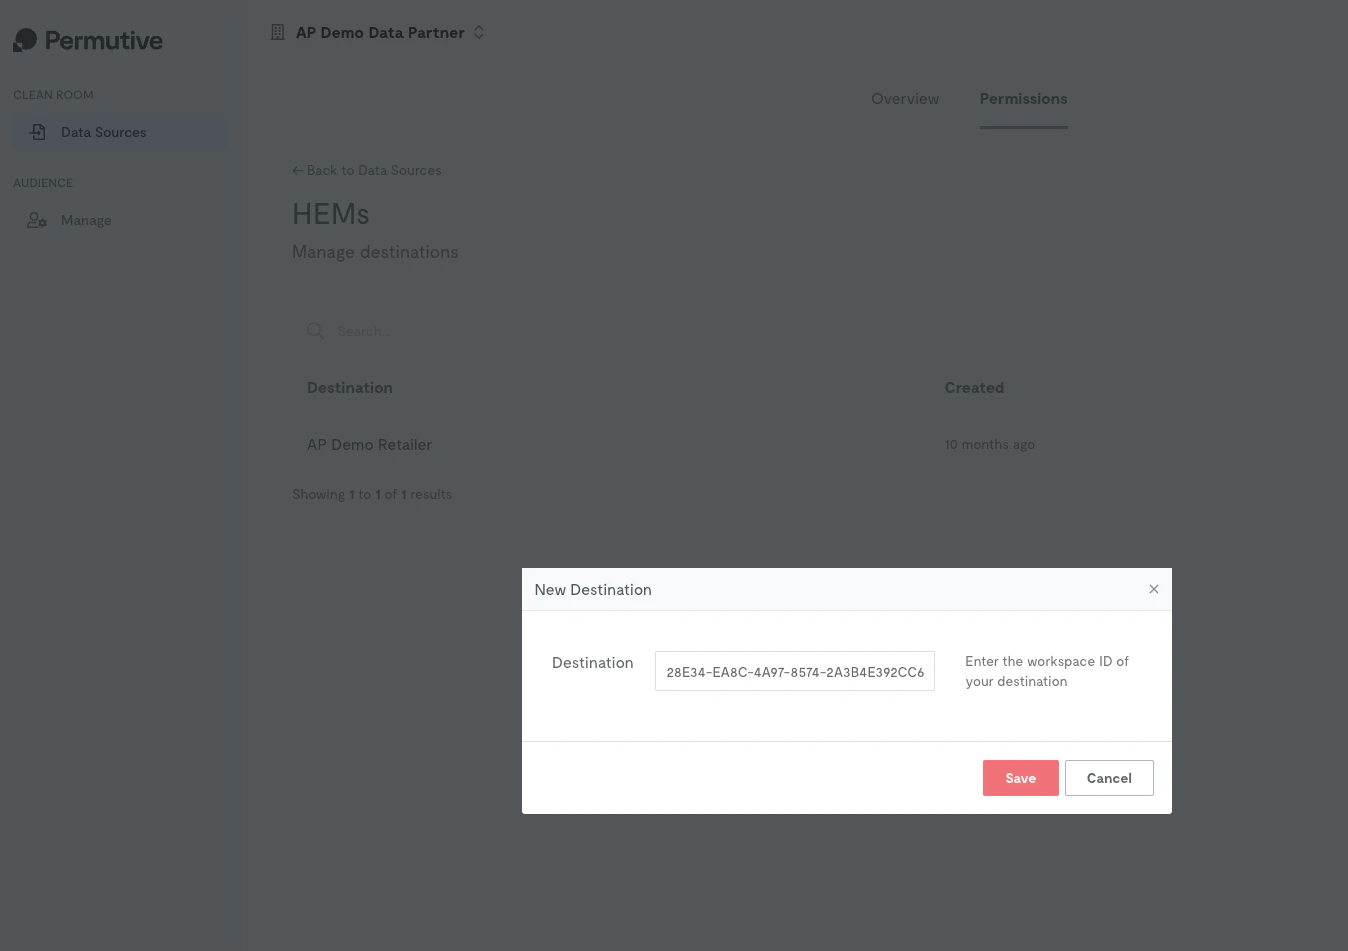
**Advertiser's view:** When granting permission, you'll see a modal where you enter the publisher's demand-side workspace ID as the destination.
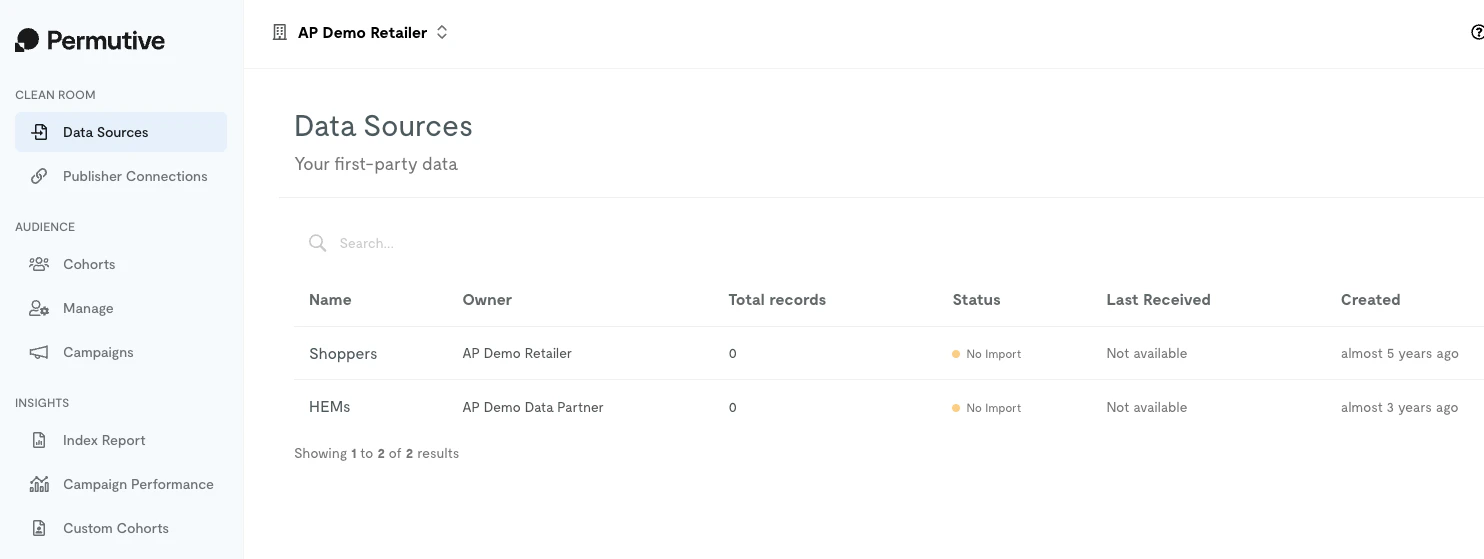
 **Publisher's view:** After permission is granted, the publisher will see your data source appear in their demand-side workspace. The Owner column shows which advertiser provided each data source.
 **Data preparation best practices:**
* Hash emails using SHA-256 — lowercase hex encoded — before uploading (do NOT upload raw email addresses)
* Normalize identifiers before hashing: lowercase emails, trim values
* Validate data quality and completeness before uploading large datasets
* Test with a small sample file first to verify format is correct
Data processing can take several hours depending on dataset size. Monitor the data source status in the interface.
## Next Steps
Build audiences from your data
Return to product overview
**Data preparation best practices:**
* Hash emails using SHA-256 — lowercase hex encoded — before uploading (do NOT upload raw email addresses)
* Normalize identifiers before hashing: lowercase emails, trim values
* Validate data quality and completeness before uploading large datasets
* Test with a small sample file first to verify format is correct
Data processing can take several hours depending on dataset size. Monitor the data source status in the interface.
## Next Steps
Build audiences from your data
Return to product overview