> ## Documentation Index
> Fetch the complete documentation index at: https://docs.permutive.com/llms.txt
> Use this file to discover all available pages before exploring further.
# Setting Up Advertiser Connections
> How to connect with advertisers in the Clean Room
## Overview
This guide walks publishers through setting up a new advertiser connection in the Clean Room. Connections allow you to share your supply-side data with advertisers for audience matching and targeting.
**This guide uses your supply-side dashboard.** All steps in this guide are completed in your supply-side workspace at dashboard.permutive.com.
### Understanding Connection Targets
The Organization ID you enter depends on your workflow:
| Workflow | Organization ID to Enter | What This Does |
| -------------------- | ------------------------------------ | ---------------------------------------------------------------------------------- |
| **Permutive-Driven** | Advertiser's Organization ID | Connects to the advertiser's demand-side workspace where they create audiences |
| **Publisher-Driven** | Your own demand-side Organization ID | Connects your supply-side to your demand-side workspace where you create audiences |
In the **publisher-driven workflow**, you're essentially connecting your two workspaces together. Your demand-side Organization ID can be found in your Clean Room dashboard under Settings.
**Prerequisites:**
* Clean Room enabled for your organization
* For Permutive-driven: Advertiser's Organization ID (they can find this in their Permutive Settings)
* For Publisher-driven: Your own demand-side Organization ID (found in your Clean Room dashboard Settings)
## Steps
Access your Permutive Dashboard at [dashboard.permutive.com](https://dashboard.permutive.com).
Click on the **Connections** tab in the menu bar.
Click **+ Add Connection**.
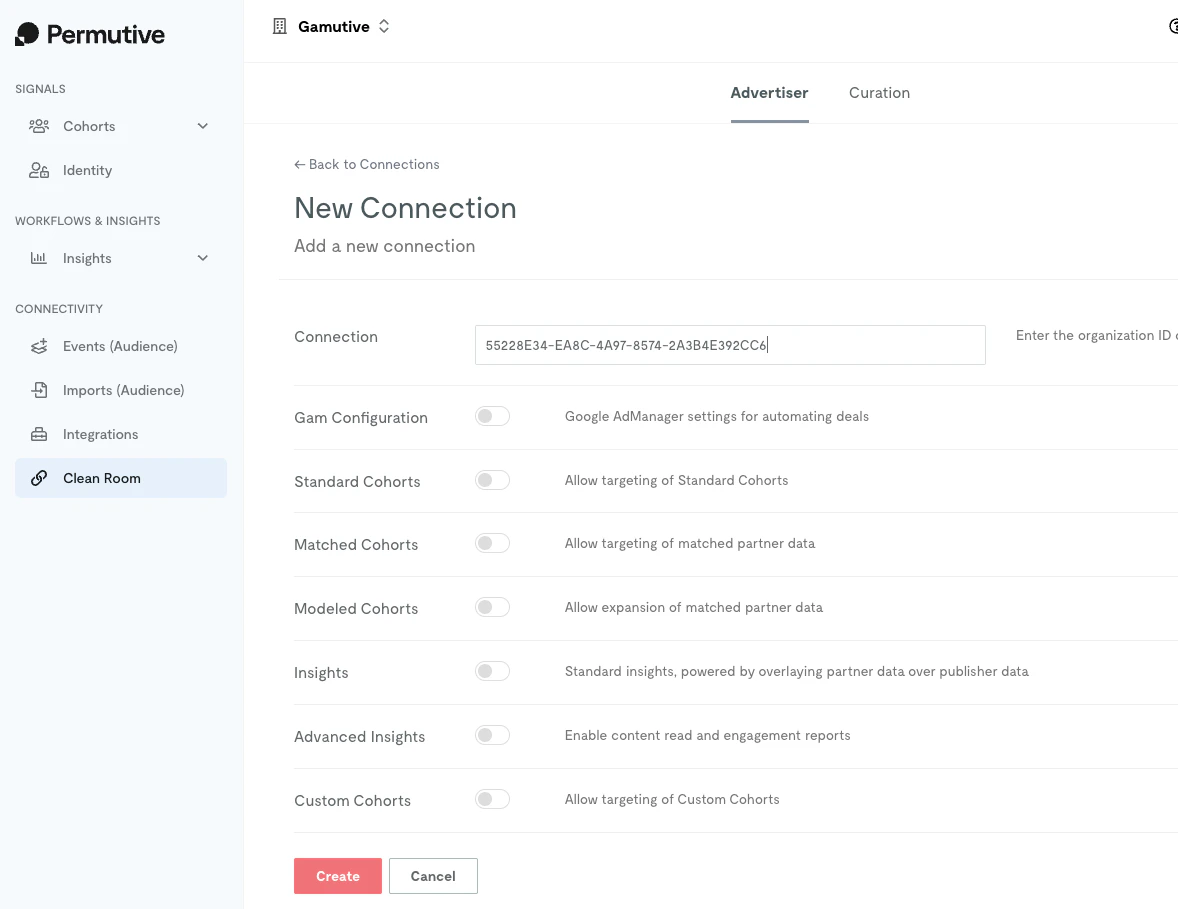
Enter the target Organization ID (format: xxxxxxxx-xxxx-xxxx-xxxx-xxxxxxxxxxxx). See [Understanding Connection Targets](#understanding-connection-targets) above to determine which ID to use for your workflow.
Choose the permissions you want to grant:
* **Standard Cohorts**: Allow targeting of pre-built standardized segments
* **Matched Cohorts**: Allow targeting of users matched between your datasets
* **Modeled Audiences**: Allow targeting of lookalike modeled audiences
* **Insights**: Enable basic insights capabilities
* **Advanced Insights**: Enable content read reports and advanced analytics
* **Custom Cohorts**: Share specific custom cohorts for direct targeting by the advertiser
Click **Create** to finalize the connection.
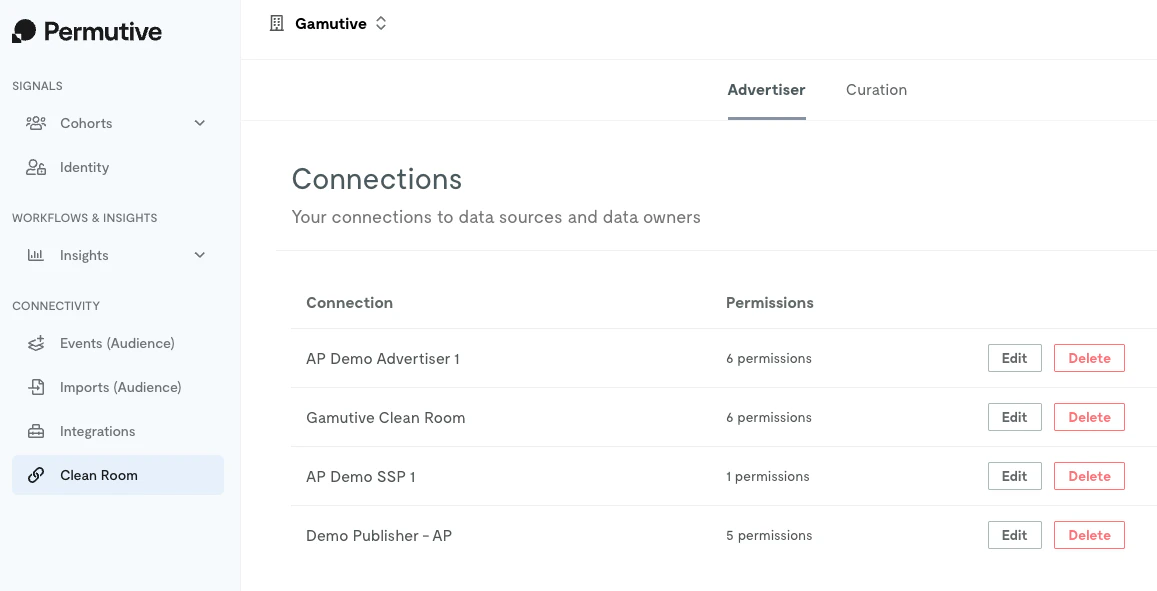
The advertiser will now appear in your list of available connections. You can edit permissions or delete the connection at any time.
## What You'll See
The Connections page shows your existing connections with their permission counts. You can edit or delete connections from here.
 When adding a new connection, enter the Organization ID and select the permissions you want to grant.
 ## Next Steps
Set up targeting in GAM or Microsoft Monetize
Return to product overview
## Next Steps
Set up targeting in GAM or Microsoft Monetize
Return to product overview